Monday, April 30, 2012

How to Roast Your Own Coffee in a Stovetop Popcorn Maker


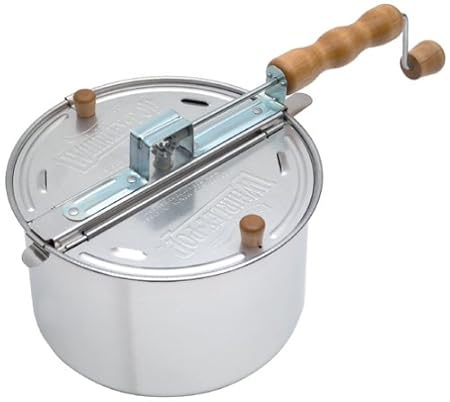
Thanks to the Institute for Domestic Technology, I learned roast my own coffee at home in a Whirley-Pop Stovetop Popcorn Popper. It's a simple, if smokey, process.

You heat up the popper on your stove top over a medium/high heat and dump in 10 ounces of green coffee beans. The beans we used were ordered from Sweet Maria's who carry a wide selection of high-end beans at inexpensive prices.

The only trick with the Whirley-Pop coffee roasting method is adjusting the stove burner. You're shooting for "first crack," the point when the beans pop kind of like popcorn. at around the 6 minute mark. Mine took a little bit longer on the first attempt, but after a few roasting sessions I'm sure I'd get the right burner setting. After first crack the beans quiet down for a few minutes. The next thing you're listening for is the "second crack." As soon as those beans start making noise again you dump them on a cookie tray to cool down. That's really all there is to it. Sweet Maria's has a pdf sheet with more detailed Whirley-Pop instructions as well as a review of other home roasting methods.

Our instructor at the Institute class, Ian Riley, suggested storing the beans at room temperature in a reusable valve bag (freshly roasted coffee beans out-gas CO2).

Unlike many home "artisinal" food methods (we probably need to retire the "a" word), home coffee roasting saves money and you get a much better product than store bought coffee.

Of course quitting coffee would also save money but you'll have to ask Mrs. Root Simple about that one--I'm an addict.

If you're in the LA area, you can take Ian Riley's home coffee roasting class at the Institute for Domestic Technology. I also teach a no-knead bread class at the institute as part of Foodcrafting 101.

Sunday, April 29, 2012

Picture Sundays: A Car Exhaust Powered Pressure Cooker


From the June 1930 issue of Modern Mechanics:
Automatic Food Cooker Runs by Exhaust Heat of Car
Meals can literally be cooked on the run through the use of the automatic cooker shown in the photo above. The cooker is mounted on the rear bumper of the motor tourist’s car and an extension from the exhaust pipe connected up with it, as shown in the insert. The cooker contains a steam pressure kettle which is heated by the hot exhaust gases. An hour’s drive is quite sufficient to thoroughly cook meats and vegetables. Total weight of the unit is so slight that running qualities of the car remain quite unaffected. Motor tours are much more pleasant when one is assured of a well-prepared meal at the end of the trip.
Thanks to the Los Angeles Master Food Preservers for the tip on this oddball bit of history.

Friday, April 27, 2012

Of Stickers and Boomers

Wendell Berry, photo by Guy Mendes

A suggestion for your weekend: Make time to settle into your favorite chair with a cup of tea, or a nice glass of wine and listen to "It All Turns on Affection" a lecture by the great Wendell Berry. This is the 2012 Jefferson Lecture in the Humanities, delivered at the Kennedy Center just this week.

Now, I'll admit that this lecture is more than an hour long--which is why I suggested the refreshment and a comfortable chair. An hour is a lot to ask of our attention days, especially an hour spent watching an elderly gentleman speak slowly at a podium in front of a truly uninspired backdrop. Where are the kittens and baby sloths? you might ask along the way, if your internet video viewing habits are like mine. Best not to think of it as a video. Think of it as a radio program, settle down to listen and you will be truly and deeply rewarded.

I had trouble embedding the video, but you can view it on its NEH page. Berry comes on stage at about the 11:00 mark.

Or, if you prefer, you can read it here. I'm reading it now after my listen, and am just beginning to absorb the finer points.

This lecture is a call for us to rediscover our affection for the land. A plea for us to be stickers instead of boomers. That is, people who tend the land and honor its history and its stories instead of boomers who despoil our limited resources and move on, without thought, as if there will always be more to wealth to wring from nature, no matter what we do.

Of course, Berry is an advocate of the small farmer (as we all should be) and his remarks have much to do with farmland, and his family's history as farmers, but I don't think us urban and suburbanites should think his plea has nothing to do with us.  I think we can develop strong affection for our little yards. We can nurture the soil and teeming life there, making our commitment to all the plants and creatures in our care. We can also develop strong affection for and commitment to our communities and neighborhoods. If we do not have land of our own, we can care for that which we are temporarily living on, and we can fight for and nurture public land.

Wherever we are, we are on the land. And whoever we are, we are of the land.

A few quotes from the lecture:

--Economy in its original—and, I think, its proper—sense refers to household management. By extension, it refers to the husbanding of all the goods by which we live. An authentic economy, if we had one, would define and make, on the terms of thrift and affection, our connections to nature and to one another.  

--That we live now in an economy that is not sustainable is not the fault only of a few mongers of power and heavy equipment. We all are implicated. We all, in the course of our daily economic life, consent to it, whether or not we approve of it. This is because of the increasing abstraction and unconsciousness of our connection to our economic sources in the land, the land-communities, and the land-use economies. 

--As many hunters, farmers, ecologists, and poets have understood, Nature (and here we capitalize her name) is the impartial mother of all creatures, unpredictable, never entirely revealed, not my mother or your mother, but nonetheless our mother. If we are observant and respectful of her, she gives good instruction. As Albert Howard, Wes Jackson, and others have carefully understood, she can give us the right patterns and standards for agriculture. If we ignore or offend her, she enforces her will with punishment. She is always trying to tell us that we are not so superior or independent or alone or autonomous as we may think.

Thursday, April 26, 2012

A Bike Tent Trailer


Now this is a cool idea. The Midget Bushtrekka is a bike tent trailer with room for camping equipment.


Like car camping with a bike.


Via Dornob.

Wednesday, April 25, 2012

How to Prevent Bees From Living in Your Walls . . . or Welcome Them In


I love and keep bees. That being said, I'd prefer not to have them living in the walls of the house. Now, a hive can live in a wall for years and cause no harm--forget about the horror stories told by exterminators (they are, after all, selling poison). But if you have to remove bees from a wall it can be an expensive job if done correctly. I've removed hives from walls and it's both hard on the bees and the beekeeper.

Thankfully you can take a few easy steps to prevent a hive from moving into your house. Bees like dark hollow spaces--think of a dead tree or an empty stud wall. Here in LA many old houses, such as ours, have lots of cracks a bee colony would be happy to move into. Note the small hole I found on one of our walls that opens into an empty space between the studs (old LA houses often have no insulation).


So how do you keep bees from moving in? According to backwards beekeeping master Kirk Anderson., all you need to do is fill a wall cavity with a can of spray foam insulation.

Please note: do not do this if there is already a hive in residence! If that is the case, hire a beekeeper to cut or trap them out. Bees are very gentle until you disturb their living quarters. If you're in Los Angeles you can call the Backwards Beekeper rescue line. If you're not in Los Angeles, start your own Backwards group!

How to Welcome Bees Into Your Wall
Now, a more permacultural approach would be to design buildings in such a way to welcome bees into a wall.  Here's an example of a hive box built into a stone wall in India:

Photo from http://ranichari.blogspot.com/
There's a tradition of keeping hives in wall or niches in Europe and many other parts of the world. No need for spray foam or exterminators--just lots of free honey from your wall.

Bee skep in a wall in Kent, England.
Time to bring back this practice!


Note from Kelly: This might seem obvious, but you would be surprised how many people pay for bee removal or extermination and then do nothing afterward to correct the conditions that attracted the bees in the first place. Invariably the bees come back, because a house which looked good to one swarm will look just as good to the next swarm that comes along. Better, in fact, because it will smell of bees. Plug those holes and screen off all vents!

Tuesday, April 24, 2012

Al Pacino Closed My Bike Lane


It's the classic urban cycling problem: when faced with the indignities of riding in a car-centric city like Los Angeles, do you make it all one big fun challenge or become what Bikesnob calls "the righteous cyclist?"  Righteous cyclists, according to Bikesnob, are "convinced that the very act of turning the pedals will actually restore acres and acres of rainforest, suck smog from the sky and refreeze the ice caps." In short they are sometimes so obsessed with the issues surrounding cycling that they fail to enjoy actually, well, cycling.

So one rainy day earlier this month, heading down busy Sunset Boulevard, I came upon a film crew blocking the bike lane. This happens fairly often, especially at this section of Sunset. Your choice is to hop on the sidewalk, rarely a good idea in my opinion, or merge into fast moving traffic.

Normally, I take the stoic approach and treat a situation like this as a challenge, an opportunity to practice living in a real life version of Frogger, somewhat like Laird Hamilton might treat a particularly gnarly big wave. But on this dark and rainy morning, I thought I owed it to any cyclist pedaling behind me to try to do something about the situation. So, acting the role of the righteous cyclist, I rode up to the security guard and asked if the film permit specified a bike lane closure. He said he'd get the production manager for me.

The production manager introduced himself and I said hello. I again asked if the film permit allowed for the closure of the bike lane. He said no, that it allowed for the closure of the "curb lane" and that it was not his fault that the curb lane was too narrow to fit his trucks. He said that originally the trucks were supposed to be parked elsewhere but that the "talent didn't want to cross the street."* The "talent," I later found out, was Al Pacino, Christopher Walken and Alan Arkin. He also said that film companies only need a permit to close the "special green bike lanes downtown" (not true).

I decided to keep my cool. What I really wanted to say at this point was something along the lines of "you Hollywood folks haven't made a decent movie in around 30 years." And, "I want to put Lars Von Trier in charge and force you all to go Dogma 95--then I'd have my friken' bike lane back, not to mention decent movies."

But I kept my cool. I thanked him for his precious Hollywood time and rode off, promising to take it up with the entity that issues the permits, Film LA.

First though, I called my friend Colin Bogart at the Los Angeles County Bicycle Coalition. He called the police who looked up the permit and found out that, indeed, this film company did not have a permit to block the bike lane.

Now, on my last trip to Portland during our book tour I snapped a picture of what happens in that city when a truck blocks the bike lane. Portlandians put up some cones to route cyclists around work vehicles:


Now here's how we do it in Los Angeles. LAPD heads down to the location and finds out that they don't have a permit to block the lane. Then, I'm guessing, Al Pacino comes out to sign some autographs and we get a "compromise":


The bike lane was still closed, cyclists still had to merge into fast moving traffic, but we got a bunch of "bike lane closed" signs. Problem solved! Note the production manager on the right, none to happy to see me again. I resisted the urge to ask him if he thought he was John-Luc Fricken' Godard.

So the Sunset Boulevard bike lane remained closed for three days all for yet another crappy Hollywood action movie. I may make my boycott permanent.

Should anyone in a position of power being reading this post, this closure was against the state's traffic rules, "Section 6D.101(CA) Bicycle Considerations . . . E. Bicyclists shall not be led into direct conflicts with mainline traffic, work site vehicles, or equipment moving through or around the [work] zone." 

--------

* Note from the Mrs.: Perhaps Messrs Pacino and Walken didn't want to cross the street because they've heard that we had two tragic pedestrian fatalities in the immediate neighborhood last month. Both of those persons were simply attempting to cross the street. They died because our city streets could be mistaken for freeways.

Monday, April 23, 2012

Of Makers and Bowyers


Film One: Harry (Archer & Bowyer) from Dylan Ryan Byrne on Vimeo.

I had a great time yesterday as a guest on a panel discussion at the LA Times Book Festival with Mark Frauenfelder and David Rees (thanks to Alisa Walker for being the best moderator ever). We talked about DIY culture and the ethos of being a "maker". I think it's safe to say that all of us on that panel have great admiration for talented "makers" like the bowyer in this video. It's been one of my many goals to step away from this computer for a bit and learn how to make a bow. Or at least to finish the backyard projects that currently block access to our target bale!

Via Exploriment

Sunday, April 22, 2012

Picture Sundays: The Cawston Ostrich Farm

"Reaching for oranges, Cawston Ostrich Farm, So Pasadena, CA." Ostriches seemed to be a big tourist attraction in the early 20th century. This place also featured a "solar motor"--click to bigulate:

Personally, I'd much rather visit the Cawston Ostrich Farm than Disneyland.

Saturday, April 21, 2012

Saturday Linkages: Mules, Turfgrass, Foraging and the End of Backyard Citrus

Emily Ho, a fellow Master Food Preserver trainee, foraged a Silver Lake salad. (Photo by Emily Ho)

A Silver Lake Salad via  

Mule-based bookmobiles for remote Venezuelan communities:  

Dismiss Cyclists At Your Own Peril: The Jackson Huang Lesson - Eagle Rock, CA Patch  

Boulder-Like Home Office is a Working Retreat in the Garden | Designs & Ideas on Dornob via  

Turfgrass Infomercial at the National Arboretum?  

But the free citrus is half the point of living here!: Disease threatens backyard citrus in CA :

These, and more linkages, are from the Root Simple twitter feed.

Friday, April 20, 2012

3 things to do with citrus peels


Waste not, want not! Our  recent post on Candied Grapefruit Peel yielded some interesting comments, and at the same time Erik made a discovery about citrus. Thus, three things to to do with your rinds:

Idea #1
Readers Terry and Barb both commented that they soak citrus peel in vinegar to make citrus infused vinegar to use for cleaning, and in Barb's case, as a deodorant. This is an excellent idea. Infusing vinegar with cleansing/disinfecting herbs, like lavender or sage, is something I've known about for a long time, but don't do, in practice. I'm too lazy. Instead, I scent my cleaning vinegar with essential oil. But we always have citrus peels laying around in piles, and the simplicity of the citrus idea is so a peeling that I had to try it. (ouch! stop throwing things!)

I filled one jar with orange peels and covered it with vinegar. After only a couple of days it started smelling really nice. Now it's about a week old and doesn't seem to be getting any more potent, so   I'm going to strain it off. In a second jar I'm trying an experimental blend of orange and thyme. Like citrus, thyme has excellent disinfectant qualities, but I'm not sure how its scent will blend with the orange.

I suspect our cleaning vinegar is going to smell like citrus from now on out.

UPDATE: I've been using orange-peel vinegar for a while now and the only drawback is that it is tinted yellow. If you spray a light surface and forget to wipe afterward, it will leave yellow stains behind. Not true stains--they wipe up easily even if they're long dry. This isn't a big problem because generally I am spraying and wiping, but once in a while I'll find yellow droplets in spot I forgot to wipe.

This, of course, disqualifies this spray for carpet cleaning. (And plain vinegar spray is a great thing to use to clean up pet accidents on carpet.)

Speaking of pet accidents, I realized this first when I found a yellow spray at the base of our bathroom sink and immediately though young Trout had taken to spraying. Cryeth the cat: "O! Unfair! I never did such thing!"


Idea #2
A reader named Chile sent us this link to an old Cuban recipe for candying grapefruit pith. As you know, grapefruit pith can be quite thick. If you have some separate use for the peel or zest, you can cut the leftover pith into cubes and candy it with cinnamon. She says it's really good!

Idea #3
Erik has learned that you can make pectin out of citrus rinds and membranes. Like apples, citrus is quite rich in pectin. This is a really good use for under-ripe, not so tasty oranges. Here's a how to link: Wedliny Domowe. The same link also has instructions for making pectin from apples. It's all about local sourcing, after all. An oddity of living where we do is that it is much easier to come by citrus than apples. At least for now.

On a related note, we also know that you can make clear, citrus flavored jelly by boiling organic citrus rinds in water, then straining off the solids. The resulting liquid is citrus-flavored and pectin-rich. Add sugar and you have citrus flavored jelly. It's tasty, we've tried it. But unfortunately, we don't have a recipe. If you happen to have a recipe, please share!

Thursday, April 19, 2012

How to Store Canned Goods: Take the Screw Band Off!

Right in the center, wrong on the left. Bungee cord 'cause we're in earthquake country.

Another quick tip from the Los Angeles Master Food Preservers: you should store your canned goods with the screw bands off. Why?
  • So you can clean underneath the band to prevent spoilage and bugs.
  • The screw band can create a false seal.
  • Leaving the screw bands on can cause corrosion. 
The only time to have the screw bands on is if you are transporting the jars. Otherwise, take them off!

Wednesday, April 18, 2012

Canning Citrus


Say you've got a huge citrus tree and want to can some of it without using a lot of sugar. The nice thing about citrus is that it's so acidic you can water bath can it in its own juice, in just water or in a light sugar syrup. In our Master Food Preserver class we did a taste test of tangerine sections canned in a variety of liquids:
  • water
  • very light syrup (1/2 cup sugar per quart)
  • light syrup (1 cup sugar per quart)
  • medium syrup (1 3/4 cup sugar per quart)
  • heavy syrup (2 3/4 cups sugar per quart)
  • very heavy syrup (4 cups sugar per quart)
  • syrup with honey (one part sugar to one part honey in any of the ratios above)
The citrus preserved in just water was edible but not particularly good nor was it aesthetically pleasing. As much as I try to avoid sugar it does help the fruit hold its shape. The best formula for canning citrus in terms of flavor and aesthetics was, in my opinion, either the very light or light syrups.  I was not fond of the honey/sugar syrup as the honey tended to overwhelm the flavor of the fruit.

A home grapefruit canning experiment I tried at home went horribly wrong, but I'll blog about that in another post. Let's just say that if I had a big citrus tree I'd consider canning some of the harvest using a very light sugar syrup. It's a decent way to get a shelf stable product with a lot less sugar than, say a marmalade or jelly. Another sugar-free alternative would be to dehydrate the fruit.

Directions for canning all kinds of fruit in syrup can be found on page 2-5 of the USDA's Complete Guide to Home Canning which you can download for free here.

Tuesday, April 17, 2012

Mellow Yellow: How to Make Dandelion Wine


Today on Root Simple we welcome another guest post from our Midwest correspondent Nancy Klehm:

In the past week, we Midwesterners have experienced three hard frosts – killing back the growth, that emerged too early of my grapes and hardy kiwis and zapping peach blossoms. We will see if there is any fruit onset and if my vines recover.

Meanwhile, it is dandelion wine time!

I first tasted dandelion wine when I bought a bottle of it at a folksy gift shop in the Amana Colonies (yes, Amana of the appliance fame). I had wanted something to drink at my campsite that evening. When I opened the bottle, I anticipated something more magic than what met my tongue. It was cloying yellow syrupy stuff, which resembled soft drink concentrate. I poured it out next to my tent, returning it to the earth where she could compost it. I was sure that I’d never get close to it again.

That was fifteen years ago, and now I have been drinking dandelion wine for about two years. The new stuff is stuff I’ve made myself from dandelion blossoms gathered in Chicago. I’m happy to say that it is divine. I am sure now that the colonists actually keep the good stuff in their private cabinets.

Upon mentioning “dandelion wine”, Ray Bradbury usually comes to mind. However, after I heard a radio interview with him a few years back when he passionately made a case to colonize the moon so we can ditch this trashed planet and survive as a race, I got confused. Enough said.

So the point is, I am going to tell you how to make dandelion wine. I encourage you to do this because dandelions pop up everywhere and every place. They are nearly ubiquitous pioneers in our landscapes of disturbed and deprived soils. Consumed, they are a magnificent digestive, aiding the heath and cleansing of the kidneys and liver. Amongst vitamins A, B, C and D, they have a huge amount of potassium.

As a beyond-perfect diuretic, dandelion has so much potassium that when you digest the plant, no matter how much fluid you lose, your body actually experiences a net gain of the nutrient. In other words, folks – dandelion wine is one alcohol that actually helps your liver and kidneys! Generous, sweet, overlooked dandelion…

When you notice lawns and parks spotting yellow, it’s time to gather. The general rule of thumb is to collect one gallon of flowers for each gallon of wine you want to make.

Enjoy your wandering. People will think you quaintly eccentric for foraging blossoms on your hands and knees. Note: collect blossoms (without the stem) that have just opened and are out of the path of insecticides and pesticides.

So here’s how I make dandelion wine…

I pour one gallon boiling water over one gallon dandelion flowers in a large bowl. When the blossoms rise (wait about twenty-four to forty-eight hours), I strain the yellow liquid out, squeezing the remaining liquid out of the flowers, into a larger ceramic or glass bowl. I compost the spent flowers (thanks dandelion!).

Then I add juice and zest from four lemons and four oranges, and four pounds of sugar (4-4-4 = E.Z.). Okay, now here’s what I think is the best part: I float a piece of stale bread, sprinkled with bread yeast, in the mixture. This technique is used in Appalachian and some European recipes.

Then I toss a dishtowel over it so the mixture can both breathe and the crud floating around my house stays out. I continue stirring the wine several times a day until it stops fermenting. This takes about two weeks or so.

When I am certain it has stopped “working”, I strain, bottle and cork it up and bid it farewell until months later. In fact I wait until the winter solstice, when I can revisit that sunny spring day by drinking it in.

Monday, April 16, 2012

Everlasting Flower for Colds

Dried California Pearly Everlasting. The flowers are small, about the size of a buttons on a shirt collar.

Last summer I was happy to be able to take a class on native plant use taught by Cecilia Garcia and James Adams, co-authors of Healing with Medicinal Plants of the West. One of the many things I learned in this class was that the flowers of California Pearly Everlasting, Gnaphalium californicum, aka cudweed aka rabbit tobacco, are supposed to be good for colds.

I've not had a chance to try it until this week. I've only had one cold since last summer, and that one hit so fast and hard I just sort of gave up on doing anything but riding it out. The one I have this week is more of a typical head cold, and  a good chance for a field test. And I can say that I think they helped. But I'm not sure how.

My confusion is a result of memory vs. notes. I remember James saying he takes this tea instead of Day Quill whenever he has a cold. So, having the flowers on hand, I took the tea expecting it to act like cold medicine. Because the effects are so subtle (unlike cold capsules) I didn't think my first cup was doing anything at all--until I realized I'd stopped sneezing and constantly blowing my nose. The relief lasted for a few hours. When I started feeling crappy again, I had another cup and the symptoms retreated again.  Over the course the first day I had 3 cups. The next day, I felt much better. My symptoms were less, though I did still feel "under siege" and retreated to bed early.

During the course of that day, I dug out my class notes and discovered that Cecilia said something different than what I remembered--she said that Everlasting is an immune stimulant, and when you have a cold you're supposed to take one cup (one!) before bed for 4 nights. It has to be 4 cups over 4 nights, even if you feel better. No more, no less. So she's using it more like Echinacea--not as a symptom relief.  Meanwhile, random internet searches affirm that it's good for colds, but don't say how.

Since my symptoms were better from day 2 on, I reverted to Cecelia's advice and took one cup before bed for the remaining 3 nights. The cold symptoms remained at bay, though I could feel the fight in my body. After a few days it was all over.

So if I experienced symptom relief, was it psychosomatic? Was the cold mild because of immune stimulation or because it wasn't much of a cold?  I really don't know, but I'm going to keep taking the tea when cold symptoms arise.

Best as I can figure, herbal medicine is all about developing a relationship with the plant, and all I've had so far is a brief introduction. More research is required, but I'm intrigued.

If you see Everlasting while out walking, bring some home and try it out and let me know what you think.

How to make the tea:
Add as many dried flower heads as will fill the hollow of your palm (7 or so? A very modest amount--Cecelia was adamant about that) to 1 cup of boiling water. Cover the cup and let it sit for 10 minutes or so--a good long steep.  It doesn't taste bad. It does have the curious effect of sort of drying out the back of my throat--but not so much that it's uncomfortable.

As far as I know it doesn't have any harmful effects, but as always, be careful.

About the plant:
Photo by Curtis Clark
Gnaphalium californicum grows on the west coast, from Baja up to Washington. It's a knee high or so, with green foliage and white flowers in the spring. By summer/fall it has dried out and displays clusters of perfectly formed little dry flower heads. This is the reason for its name, Everlasting. It makes everlasting dried flower arrangements.


Look for it in disturbed places, hillsides, construction areas and the like, because it's a pioneer plant. If you want to grow it, it is available through native plant suppliers.

Sunday, April 15, 2012

Picture Sundays: Mysterious Microwave Button


So this microwave has a "personal choice" button right next to the popcorn setting.


No determinism button. I think this proves something.

Saturday, April 14, 2012

Saturday Linkages: Tiny Houses, Human Cheese, Doomsday Condos and Speakin' Squirrel


Tiny Cabin in Scottish Countryside

And . . . Anderson Cooper tackles tiny houses

Cat needs to learn water conservation:

No it's not one of our April Fools day jokes: Breast Milk Ice Cream, Human Cheese

Doomsday condos in old missile silos:

Thomas Rainer's 5 Myths about Native Plants

Learn to speak squirrel:

Abused Altadena Kitten Still Needs a Home

These, and more linkages, are from the Root Simple twitter feed.

Friday, April 13, 2012

Candied Grapefruit Peel


Erik sourced some nice grapefruits from our friend's tree and used the flesh to do some homework for his Master Food Preserver program. This left a big pile of organic, unwaxed grapefruit rind on our counter, so I decided to do something about it, and set off to make candied grapefruit peel. This is the technique I came up with by mashing together a bunch of different internet recipes and making two batches of the stuff. The results are delish if a bit rustic in appearance. I don't think I'd pass muster at French pastry school with my lazy technique, but Erik and I like them a lot.

You must genuinely love grapefruit, the bitterness of it, to appreciate these. If you're not a grapefruit fan, I'm sure this would work with orange rind as well. If you are a grapefruit fan, you'll find yourself sneaking off to the candy jar for a little more that sweet-bitter flavor punch.

We've been snacking on them straight, but I think they'd be really good chopped into small pieces and sprinkled over vanilla ice cream or folded into scones or dipped in chocolate. I like them as straight-up candy because they're so intense they satisfy restless cravings, but for the same reason you can't gorge on them. Actually, I can't eat more than two at a time. The how-to after the break.

Thursday, April 12, 2012

A Review of Williams-Sonoma's Agrarian Line

Last week upscale retalier Williams-Sonoma announced an urban homesteady line of goods they call "Agrarian". A number of Root Simple readers responded to the news after I linked to a Wall Street Journal article about the Agrarian line. One reader likened the "Agrarian" items to Marie Antoinette's 18th century cosplay mini-farm. Another hoped that mainstream acceptance of things like chicken coops and beehives might lead to fewer uptight home owners association restrictions. Yet another speculated that Ikea would come out with similar, but more modernist, options. But rather than delve into the cultural meaning of the Agrarian line (you are all welcome to do that in the comments), I thought I'd look at a few of their actual offerings in beekeeping, chicken coops, canning supplies and books.


Beekeeping
Let's start with the beekeeping supplies. The hives boxes they offer are very attractive but simply too expensive. If you want English style hive boxes like the ones Williams-Sonoma offers you can get them a lot cheaper at Brushy Mountain. The detailing on the Williams-Sonoma hives are better, but not enough to justify the price difference, in my opinion. Personally, I'd suggest saving even more money and going with the "migratory" boxes used by commercial beekeepers. Our local supplier, LA Honey sells them for a fraction of the cost of English style boxes. Three ten frame unassembled medium supers, a lid and bottom board run just a little over $100 at LA Honey compared with $500 for Williams-Sonoma's three hive boxes. Hive boxes get smoked, weathered and banged up, so it's not something I'd spend a lot of money on. Ditch the foundation and you'll save even more money.


But it's the veil in the beehive starter kit Williams-Sonoma is selling that bothers me the most. Like most of the other offerings in the Agrarian collection that veil is more about the image of the activity, in this case beekeeping, than it is about actual activity, i.e. beekeeping. This is, of course, the essence of modern marketing as pioneered nearly a century ago by Sigmund Freud's nephew Edward Bernays (watch the Century of the Self to go down that left hand path). Use that stylish Williams-Sonoma veil and I'll guarantee you that you'll have a few angry bees crawling up the inside of the veil. Inexperienced beekeepers, such as myself, are better off with more protection. It ain't stylish, but this one piece suit from Dadant has saved my rear on more than one occasion.

Dadant Bee suit. Prada it ain't.

As far as Williams-Sonoma's beekeeping books go, I'm not a fan of the ones they are selling. I'd get a copy of The Complete Idiot's Guide to Beekeeping and The Practical Beekeeper Volume I, II  and III: Beekeeping Naturally, both of which tell you how to keep bees without using chemicals and with minimal intervention.


An Upscale Chicken Coop
Williams-Sonoma's "Alexandria" coop is mighty fine looking, but, like the beekeeping equipment, expensive. Just the coop will set you back $879. Add the $399 run and you've got some expensive eggs. Peaceful Valley Farm Supply has a decent looking $400 coop if you don't feel like building one yourself. Update: Make sure to read Terry's comment on this post for her thoughts on the sizing and weather performance of this coop. I completely agree with her.


Euro-style Canning Supplies
The canning supplies in the Agrarian collection are really nice. While the USDA only recommends using two piece Ball/Kerr lids, the attractive Weck jars Willliams-Sonoma carries have a number of advantages. There's no BPA and the only piece you have to throw out and replace is the rubber gasket.

Books
Of course if they were carrying our books I'd be writing a glowing review (just kidding, though looking at my taxes, maybe I'm not kidding!). There's a few excellent books here, especially The Preservation Kitchen: The Craft of Making and Cooking with Pickles, Preserves, and Aigre-doux. Many of the other books suffer from the "Century of the Self" problem mentioned above--they're all about image, which equals too many pictures and not enough actual how-to advice.

Conclusion
That a major upscale retailer is selling chicken coops and canning supplies goes to show how much things have changed in the past ten years. I take this as a good sign. Perhaps some of those Weck jars will trickle down to my local hardware store. Maybe Rem Koolhass will design a chicken coop for Ikea (though I pity the poor chickens who will have to live in it). And, someday those uptight HOAs will be so thick in goats they'll resemble a small Afghan villages. Thank you great recession!

Wednesday, April 11, 2012

Altadena Kitten Needs a Home


Some horrible person kicked this little kitten. My friend April took her to the vet and saved her life. She needs a home. She is about 9 months old, is fixed with a tipped ear, and has had her rabies and 3-in-1 shots. If you'd like to take her home please contact April at schwassa@aol.com.

Kelly's Shibori Challenge

Hanging shibori fabric.  Image by Katie, courtesy ofWikipedia
Kelly here:

1) I know, I know. What's with Root Simple and all this Japanese stuff? I don't know!

2) This is less a post than a plan. I'm going to tell you all my plan so I can't get lazy, back out, and watch Netflix instead of working.  As I execute this plan, I'll post some more and so hopefully will share some useful information with you along the way,

The plan is in three parts:

Part the First: I'm going to make natural dyes using common plants like red cabbage and sour grass, following the instructions in The Handbook of Natural Plant Dyes: Personalize Your Craft with Organic Colors from Acorns, Blackberries, Coffee, and Other Everyday Ingredients by Sasha Duerr. It's a gorgeous little book and very inspirational--we'll see if the instructions work.

Part the Second: I will apply these dyes to fabric using shibori techniques. Shibori is the art of dying fabric using pattern making techniques like folding, binding and stitching the fabric prior to soaking it in the dye bath. It's super-classy Japanese tie dye. Except common tie dye is to shibori as this post is  to a Shakespeare sonnet.

I just got a book which is supposed to be the classic text on shibori from the library: Shibori: The Inventive Art of Japanese Shaped Resist Dyeing. It's an encyclopedia of all the (many, many) shibori techniques--with how-to's-- and lots of photos of mind-blowingly gorgeous old textiles. As a bonus, in the appendix they tell you how to mix up your own indigo dye.

The shibori cloth crafted by ancient Japanese artisans is maybe just a little beyond my skill set.  However, at Honestly... WTF you can see the nice results that crafty people get when they try their hand with some basic shibori techniques.

Part the Third: I will sew this fabric up into cocktail napkins, something along the lines of the napkins in this post on Design Sponge. We need cocktail napkins so I don't have to keep buying paper napkins when we have groups at our house, and more importantly, to reintroduce myself to the sewing machine. Technically I know how to sew, but I've never been very good at it, and now I'm so rusty I'll be lucky to remember how thread the machine. The napkins will remind me how to sew in a straight line.

Here's the challenge:  By May 15th (1 month plus a few extra days because I have to travel)  I have to be able to show you some finished shibori-dyed cocktail napkins. And there will be how-to posts along the way. Or posts relating disasters.

If anyone has tips on foraged dyes, shibori or cocktail napkin techniques, please do chime in.

Tuesday, April 10, 2012

Introducing Nancy Klehm With Tips on Growing Jerusalem Artichokes

Photo by Ann Summa
We're very proud to welcome to the blog our good friend Nancy Klehm. Nancy is a radical ecologist, designer, urban forager, grower and teacher. Most importantly, unlike Kelly and I here in Los Angeles, she lives in a place subject that odd meteorological condition called "winter", namely Chicago. We asked her to write posts for us for on gardening in a four-season climate and to add her expertise to Root Simple. Nancy's website, where you can find listings for her upcoming classes and events is http://spontaneousvegetation.net/.

She keeps a garden in her yard, an empty lot next to her house and on her roof in addition to lots of indoor seedlings. She has 5 chickens (one is rooster) and 7 quail (5 bobwhite and 2 coturnix). She also grows and gathers in her neighborhood and maintains a half acre food forest west of the city. In her first post for Root Simple Nancy introduces her climate and offers some tips on growing Jerusalem artichokes:

Welcome to Zone 5
I live in what is known by the USDA as Cold Hardiness Zone 5. Chicago is 5B and my food forest is in 5A. If you don’t know, the map is based on minimum average temperatures and helps as a guideline for first and last frost dates: http://www.usna.usda.gov/Hardzone/ushzmap.html. In the Midwest, where winter is a serious endeavor, a zone 5 growing season’s frost dates are May 15 and Nov 1, meaning that is the bracket for growing more tender annual plants such as basil, tomatoes, melons, etc. We have had a mild winter and a very early Spring this year – almost a month ahead according to any record. As a true farmer said: ‘This is the warmest April on record.’ And it was still March when he said it.

In the past 10 days, dodging rain and wet soil, I have planted out potatoes, asparagus, peas, collards, chard, kale, radishes, carrots, beets, turnips, salsify, and cress. I have many vegetables, fruits, culinary and medicinal herbs sown and growing under lights indoors that have weeks ahead of them under 14 hours of artificial sun. But thankfully, I have already been eating out of my garden which is a loose collection of the cultivated and the forageable: asparagus, stinging nettle, dandelion, chickweed, dock, wild and French sorrel, parsley, pea shoots, garlic mustard, ground ivy, wild onion, horseradish leaves, wild carrot, hawthorn flower and burdock root. The hops are almost four feet high, the fruit trees are in heavy bloom and my pawpaw birthed 14 blossoms for the first time since I planted its seed seven years ago!

The problem with this early spring is that it is likely to freeze between now and may 15. Everyone I know who grows tree fruit commercially is a bit worried about the fast blooms so early in the season. We could lose our fruit if the weather snaps to 30 degrees.


Jerusalem artichokes – PLANT NOW!
I was given a lunch bag full of dirty Jerusalem artichoke roots a handful of years ago and now I have a stand that is at least 500 square feet. It is in the center of my food forest. The stand acts like a giant sponge to absorb the extra water that floods my growing area now that the natural hydrology has been interrupted by a nearby housing developer. The stand provides shade for toads and in wet times, muddy crayfish tunnel into the mud around its tubers. In August, the flowers are 10 feet tall. Every spring, I dig out 30-50 pounds of chokes from my ever expanding bed to keep them from overwhelming my young quince and apple trees, which they would if I didn’t.

Muddy chokes and a few worms.

Chokes are a delicious wild perennial food. Darn easy to grow, but can be a lot of work to dig and wash and are really tough to store well. They either mold or dry out quickly once out of the ground and, even if I keep them nice and muddy, I haven’t had the luck or skill to store then over two weeks. In other words, use them or process them immediately.

Washed chokes and wild carrots drying.

I almost broke my mother’s Kitchen Aid when I tried to make Jerusalem artichoke flour, an answer to my father’s diabetes and new anti-gluten faddists. I sliced them, dried the slices and then tried to use the Cuisine Art to chop them up. Wrong tool, so I went to the mixer. It beat on and on for 10 minutes. I threw a towel over the top of the entire machine to keep the fine clouds of dust down. I got flour as well as some hard bits which I sifted out. It was tasty, but given the work I had to do, I had to think of another approach. And this is coming from someone pretty intrepid athlete with food processing. Making sunchoke flour takes second place for me just after creating my own dried pectin from wild crab apple skins.

Note from Kelly for folks in dry climes: Jerusalem artichokes grow in LA, too. We blogged about them here, where you can see a picture of one growing (they look like small sunflowers on enormous stalks). Our patch didn't grow for more than one year because we decided we didn't want to water them.  I believe in a wetter place they can grow without inputs--indeed, they're hard to stop once they get going!-- but in a dry climate they do need some water.

Monday, April 09, 2012

How to Shop at a Korean Grocery Store


Via Evan Kleiman's always informative radio show Good Food, (available as a free podcast in the iTunes store), an illustrated walk down the aisles of a Korean grocery store with Debbie Lee. Learn how to make your meals more exciting with pepper paste and save some money while you're at it!

Sunday, April 08, 2012

Picture Sundays: Bile Beans

ETA: Kelly says: Bile beans on Easter Sunday? Oh, Erik. I'm adding the following photo to this post. It's really exciting that a Barred Rock is featured in the photo, plus, it illustrates the ambiguous relationship between rabbits and eggs that marks Easter: a persistent ambiguity that leads little kids to believe bunnies lay eggs, or at least the chocolate ones. Here, the bunny seems to have domesticated the hen as both an egg producer and draft animal. It's unclear what the rabbit is planning to do with his cache of eggs, but he's in a hellfire hurry to get somewhere with them.


And now back to our regularly scheduled post:


"This represents a healthy life, throughout its various scenes, just such a life as they enjoy, who use the Smith's bile beans."

According to an article in the International Journal of Pharmaceutical Medicine, bile beans were,
a very popular proprietary medicine during the twentieth century in the UK. The product consisted of a variety of purgatives, cholagogues and carminatives formulated into a pill and advertised for ‘inner health’. The product was devised in Australia in 1899, survived a damning judgement in a law court in Scotland in 1905, became a brand leader in the 1930s and was on sale until the mid-1980s.
Thanks to Senor W for the photo.

Saturday, April 07, 2012

Friday, April 06, 2012

The Secret to Japanese Cooking: Dashi

Bonito flakes, available at any Japanese market.

We conclude our Japanese themed week with the sauce that's sort of the unified field theory of Japanese cooking: dashi. It's in everything from noodle dishes to sauces to miso soup and it cooks up in just minutes. Dashi contains two ingredients, kombu (a kind of kelp) and bonito (shaved, fermented fish flakes). It's the backbone of Japanese cooking, but we think it's gentle, savory character could adapt well to Western-style cooking if you use it as a substitute for vegetable stock.

Dashi only keeps a few days in the fridge, so the secret to using it regularly is to freeze half of every batch you make.

Next Friday we'll post a recipe for vegetables simmered in dashi. This is a classic Japanese cooking technique, and we've become very fond of it as an alternative to our usual saute/steam/bake repertoire.

Sonoko Sakai, who taught the soba noodle class we described in an earlier post wrote an article on dashi complete with a detailed recipe.

As an aside, I'm really interested in any of you who have foraged your own edible seaweed--if that's you, please leave a comment.

Thursday, April 05, 2012

Introducing the Dehydrated Kimchi Chip


Our focus this week has been all things Japanese, but now we're taking a detour to Korea...or at least to kimchi:

What would be the fermentation equivalent of finding a new planet in our solar system, cold fusion and a unified field theory all wrapped into one new discovery? That tasty snack breakthrough could very well be the dehydrated kimchi chip. Oghee Choe and Connie Choe-Harikul of Granny Choe's Kimchi Co.'s just won the Good Food Day LA cabbage cooking contest with their kimchi chip over the weekend. I got to taste one of those kimchi chips and I can say that they deserved the award.

Why make a kimchi chip? In a press release Harikul says, "We always have loads of kimchi at home, on account of the family business, so we started dehydrating our original spicy kimchi to halt fermentation when a batch was about to turn overripe."

How do you make kimchi chips at home? It's simple, according to Harikul, "We use an American Harvest Snackmaster dehydrator that was given to us by a fellow Freecycler. Lay the kimchi out on two trays and dry it on high for 12 hours. Easy peasy."

Harikul and Choe have some suggestions for cooking with kimchi on their website. And they were nice enough to give us a recipe for kimchi that we included in our book Making It: Radical Home Ec for a Post-Consumer World.